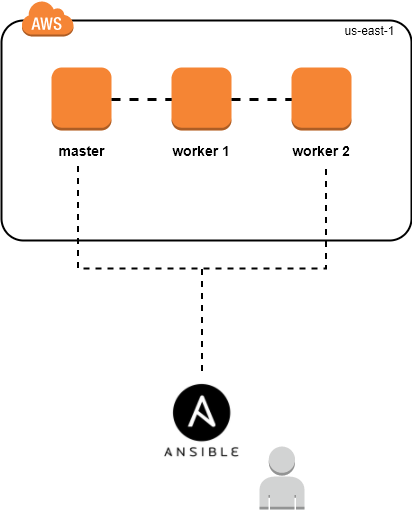
This post is part of “IaC” series explaining how to use Infrastracture as Code concepts with Terraform. In this part, I will show you how to setup a Swarm cluster on AWS using Ansible & Terraform as shown in the diagram below (1 Master and 2 Workers) in less than 1 min ⏱:
In this quick tutorial, I will show you how to install Docker 🐋 on AWS EC2 instance and run your first Docker container.
1 – Setup EC2 instance
I already did a tutorial on how to create an EC2 instance, so I won’t repeat it. There are few ways you’ll want to differ from the tutorial:
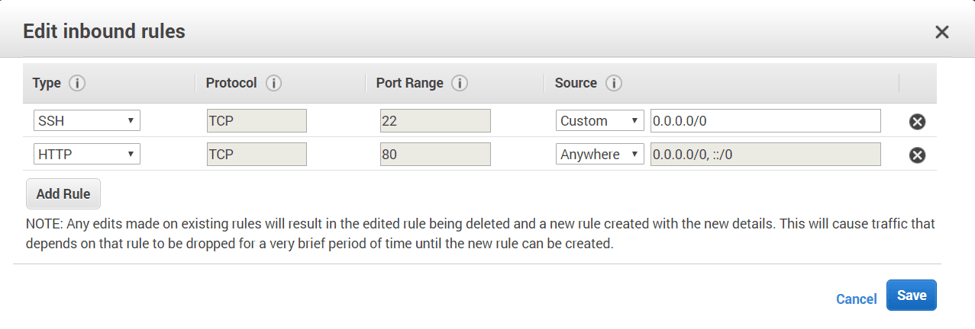
We select the “Amazon Linux AMI 2017.03.1 (HVM), SSH Volume Type” as AMI. The exact versions may change with time. We configure the security groups as below. This setting allows access to port 80 (HTTP) from anywhere, and SSH access also.
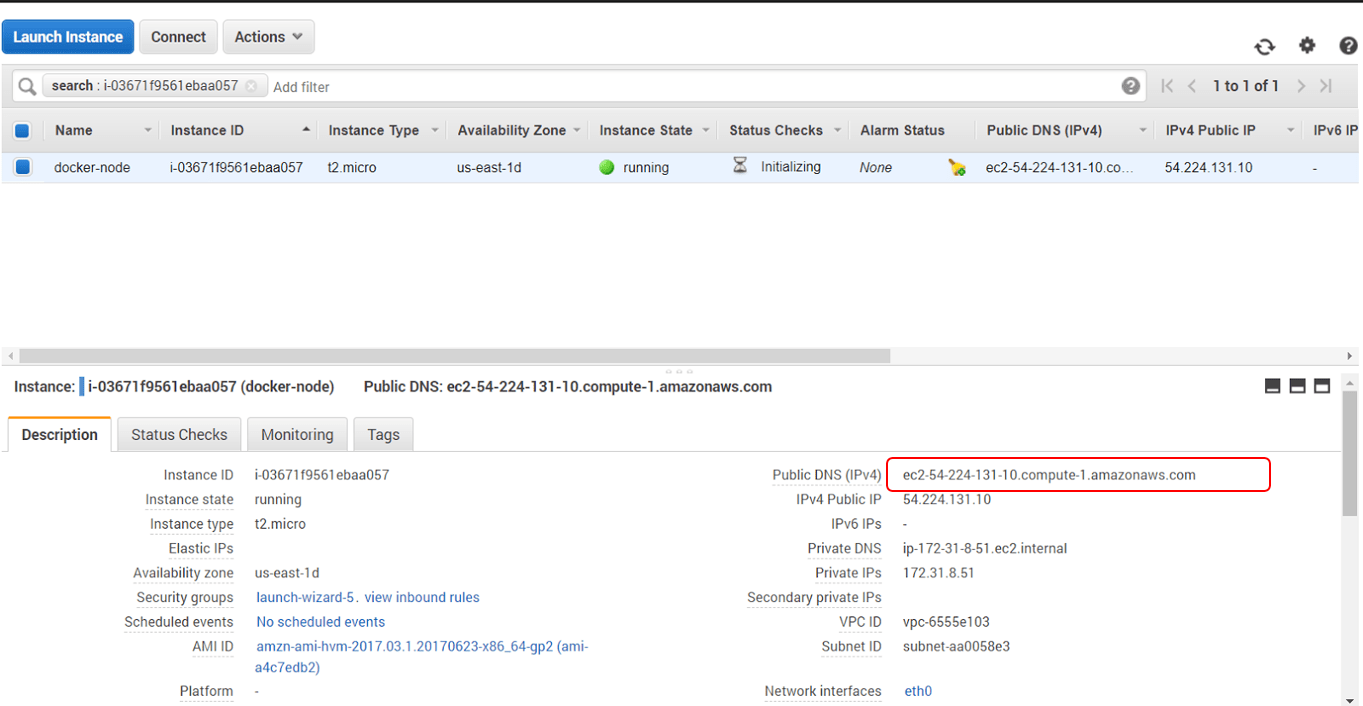
Go ahead and launch the instance, it will take couple of minutes:
2 – Install Docker
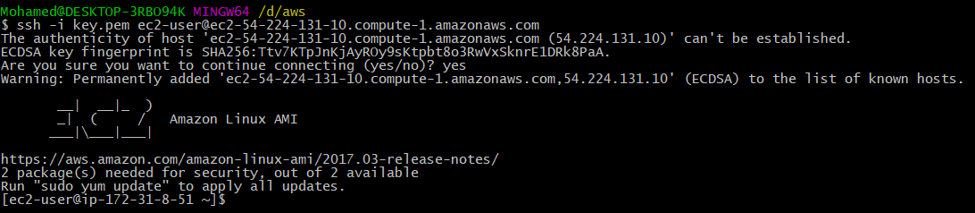
Once your instance is ready to use, connect via SSH to the server using the public DNS and the public key:
Once connected, use yum configuration manager to install Docker, by typing the following commands:
1 2
sudo yum update -y sudo yum install -y docker
Next, start the docker service:
In order to user docker command without root privileges (sudo), we need to add ec2-user to the docker group:
1
sudo usermod -aG docker ec2-user
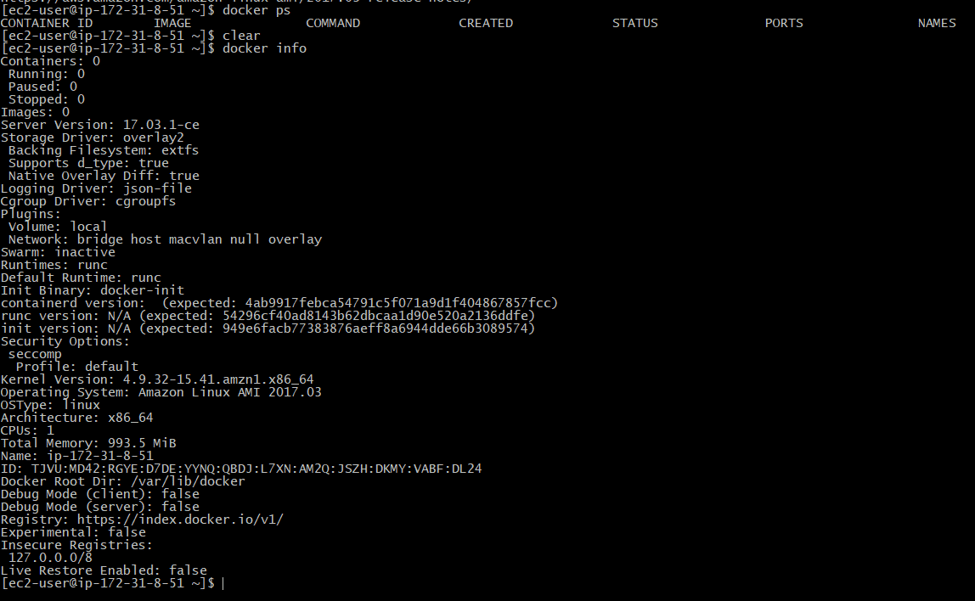
To verify that docker is correctly installed, just type:
As you can see the latest version of docker has been installed (v17.03.1-ce)
Congratulation ! 💫 🎉 you have now an EC2 instance with Docker installed.
3 – Deploy Docker Container
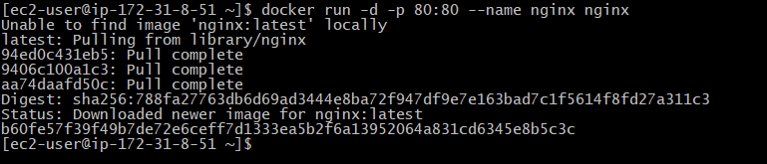
It’s time to run your first container 😁. We will create an nginx container with this command:
If we run the list command “docker ps”, we can see that a nginx container has been created from the nginx official image.
Finally, you visit your instance public DNS name in your browser, you should see something like this below:
Drop your comments, feedback, or suggestions below — or connect with me directly on Twitter @mlabouardy.
In this first tutorial of the “ChatOps” series , I will show you quickly how to create a Facebook Messenger Bot in Golang. All the code used in this demo can be found on my Github.
1 – Messenger bot
We will start by creating a dummy web server with one endpoint to print a hello world message. I’ll use “gorilla/mux” package to do that. I found it much easier to setup routes for our server rather than using the go standard library.
We first need to install “gorilla/mux” library:
1
go get github.com/gorilla/mux
Then, create a file called app.go with the following content:
funcHomeEndpoint(w http.ResponseWriter, r *http.Request) { fmt.Fprintln(w, "Hello from mlabouardy :)") }
funcmain() { r := mux.NewRouter() r.HandleFunc("/", HomeEndpoint) if err := http.ListenAndServe(":8080", r); err != nil { log.Fatal(err) } }
So basically, we have a main function which create a new route “/”, and associate to this path a HomeEndpoint function that use ResponseWrite reference to print a message. Then it start a HTTP server on port 8080.
To verify that things are working, start your local server with:
It simply looks for the Verify Token and responds with the challenge sent in the verification request.
1.2 – Messages Handler Endpoint: (POST /webhook)
1 2 3 4 5 6 7 8 9 10 11 12 13 14 15 16
funcMessagesEndpoint(w http.ResponseWriter, r *http.Request) { var callback Callback json.NewDecoder(r.Body).Decode(&callback) if callback.Object == "page" { for _, entry := range callback.Entry { for _, event := range entry.Messaging { ProcessMessage(event) } } w.WriteHeader(200) w.Write([]byte("Got your message")) } else { w.WriteHeader(404) w.Write([]byte("Message not supported")) } }
It serialize the request body into Callback object , then it parse it and fetch the message object and pass it as an argument to ProcessMessage function that will use Facebook Graph API to send the response to the user (in this case we will send an image):
Our local server url http://localhost:8080 is not available to all the other people in the internet and doesn’t support HTTPS which is necessary for Facebook Messenger bot. Therefore, we need to expose it to the public.
2 – Deployment
Note: You could also use a tool like ngrok. It basically creates a secure tunnel on your local machine along with a public URL you can use for browsing your local server. Keep in mind, to use your bot in production, you need to use a real IaaS like AWS, Heroku, Clever Cloud, etc
In this tutorial I will choose CleverCloud as IaaS provider, it deploys your Go application for free and offer you extra add ons like monitoring, logs, scaling, continuous delivery …
In order to deploy to CleverCloud you’ll need a CleverCloud user account. Signup is free and instant. After signing up:
We click on “Add an application”, then you can either upload your app code from local repository or from Github:
Next, We choose GO as our server side language. Then, we click on “Next”
We left all fields as default, and we click on “Create”
Our server does not use any external resources (MySQL, Redis …) so we will simply skip this part by clicking on “I don’t need any add-on”
Congratulations! You have successfully deployed your server.
ID is the string on the bottom right of the dashboard,
3 – Facebook Setup
3.1 – Create Facebook Page
If you don’t already have one, you need to create a facebook page that we will use to connect our bot to.
Just give it a name, and that’s it now you have created a Facebook page for you Bot
3.2 – Create Facebook App
Once the page was created, we will create a facebook app which will be connected your webhook server and your public page: which works as middleware that connects your Webhook (APP URL) and your public page.
You need to give your app a name then click on “Skip and Create App ID”
After creating an app, we need to add Messenger as a platform. So we click on “Add Product” then select Messenger as a product
Now you’re in the Messenger settings. There are few things in here you’ll need to fill out in order to get your chatbot wired up to the server endpoint we set up earlier.
3.2.1 – Generate a Page Access Token
Using the page we created earlier, you’ll get a random “Page Access Token”
You need to copy the token to your clipboard. We’ll need it as an environment variable (PAGE_ACCESS_TOKEN) for our server.
3.2.2 – Setup subscription
Next, we click on “Setup webhook” button on “Webhooks” section, a new popup will show up:
Callback URL : Clever Cloud we set up earlier
Verify Token : A secret token that will be sent to your bot, in order to verify the request is coming from Facebook, Make sure to remember the value because we will need it as a second environment variable (VERIFY_TOKEN) for the server
Subscription Fields : represents which events you want Facebook to notify your webhook about, in this case, we will choose “messages”
After you’ve configure your subscription, you’ll need to subscribe to the specific page, you want to receive message notification for
3.2.3 – Set environment variables
Once you’ve gotten your PAGE_ACCESS_TOKEN and VERIFY_TOKEN, make sure you add those two as environment variables for the server on clever cloud dashboard
Then restart the application and you should be good to go !
4 – Test the Bot
Go to your Facebook Page and send a message to it. You should see a gif back to you
5 – Customize your Bot’s behavior
In this quick tutorial I showed you how to build a simple & dumb bot for facebook messenger, to make it smarter and have more interactions with the user. We need to use a NLP backend like api.ai (Google), wit.ai (Facebook) or motion.ai. And that will be the subject of my upcoming tutorial