Docker on Elastic Beanstalk Tips

AWS Elastic Beanstalk is one of the most used PaaS today, it allows you to deploy your application without provisioning the underlying infrastructure while maintaining the high availability of your application. However, it’s painful to use due to the lack of documentation and real-world scenarios. In this post, I will walk you through how to use Elastic Beanstalk to deploy Docker containers from scratch. Followed by how to automate your deployment process with a Continuous Integration pipeline. At the end of this post, you should be familiar with advanced topics like debugging and monitoring of your applications in EB.


1 – Environment Setup

To get started, create a new Application using the following AWS CLI command:

1
2
aws elasticbeanstalk create-application --application-name avengers \
--region eu-west-3

Create a new environment. Let’s call it “staging” :

1
2
3
4
5
aws elasticbeanstalk create-environment --application-name avengers \
--environment-name staging \
--solution-stack-name "64bit Amazon Linux 2017.09 v2.9.2 running Docker 17.12.0-ce" \
--option-settings file://options.json \
--region eu-west-3

Head back to AWS Elastic Beanstalk Console, your new environment should be created:


Point your browser to the environment URL, a sample Docker application should be displayed:


Let’s deploy our application. I wrote a small web application in Go to return a list of Marvel Avengers (I see you Thanos 😉 )

1
2
3
4
5
6
7
8
9
10
11
12
13
14
15
16
17
18
19
20
21
22
23
24
25
26
27
28
29
30
31
32
33
34
package main

import (
"encoding/json"
"io/ioutil"
"log"
"net/http"
)

type Avenger struct {
Character string `json:"character"`
Name string `json:"name"`
}

var avengers []Avenger

func init() {
data, _ := ioutil.ReadFile("avengers.json")
json.Unmarshal(data, &avengers)
}

func IndexHandler(w http.ResponseWriter, r *http.Request) {
response, _ := json.Marshal(avengers)
w.Header().Set("Content-Type", "application/json")
w.WriteHeader(200)
w.Write(response)
}

func main() {
http.HandleFunc("/", IndexHandler)
if err := http.ListenAndServe(":3000", nil); err != nil {
log.Fatal(err)
}
}

Next, we will create a Dockerfile to build the Docker image. Go is a compiled language, therefore we can use the Docker multi-stage feature to build a lightweight Docker image:

1
2
3
4
5
6
7
8
9
10
11
12
13
FROM golang:1.10 as builder
WORKDIR /go/src/github.com/mlabouardy/docker-eb-ci-mon
COPY main.go .
RUN CGO_ENABLED=0 GOOS=linux go build -a -installsuffix cgo -o app .

FROM alpine:latest
MAINTAINER mlabouardy
RUN apk --no-cache add ca-certificates
WORKDIR /root/
COPY --from=builder /go/src/github.com/mlabouardy/docker-eb-ci-mon/app .
COPY avengers.json .
EXPOSE 3000
CMD ["./app"]

Next, we create a Dockerrun.aws.json that describes how the container will be deployed in Elastic Beanstalk:

1
2
3
4
5
6
7
8
9
10
11
12
{
"AWSEBDockerrunVersion": "1",
"Image": {
"Name": "mlabouardy/avengers",
"Update": "true"
},
"Ports": [
{
"ContainerPort": "3000"
}
]
}

Now the application is defined, create an application bundle by creating a ZIP package:

1
zip -r deployment.zip .

Then, create a S3 bucket to store the different versions of your application bundles:

1
aws s3 mb s3://avengers-docker-eb --region AWS_REGION

And create a new application version from the application bundle:

1
2
3
4
5
aws elasticbeanstalk create-application-version --application-name avengers \
--version-label v1 \
--source-bundle S3Bucket="avengers-docker-eb",S3Key="deployment.zip" \
--auto-create-application \
--region AWS_REGION


Finally, deploy the version to the staging environment:

1
2
3
aws elasticbeanstalk update-environment --application-name avengers \
--environment-name staging \
--version-label v1 --region AWS_REGION

Give it a few seconds while it’s deploying the new version:


Then, repoint your browser to the environment URL, a list of Avengers will be returned in a JSON format as follows:


Now that our Docker application is deployed, let’s automate this process by setting up a CI/CD pipeline.

2 – CI/CD Pipeline

I opt for CircleCI, but you’re free to use whatever CI server you’re familiar with. The same steps can be applied.

Create a circle.yml file with the following content:

1
2
3
4
5
6
7
8
9
10
11
12
13
14
15
16
17
18
19
20
21
22
23
24
25
26
27
28
29
30
31
32
33
34
35
36
37
38
39
40
41
42
43
44
version: 2
jobs:
build:
docker:
- image: circleci/golang:1.10

working_directory: /go/src/github.com/mlabouardy/docker-eb-ci-mon

steps:
- checkout

- setup_remote_docker

- run:
name: Install AWS CLI
command: |
sudo apt-get update
sudo apt-get install -y awscli

- run:
name: Test
command: go test

- run:
name: Build
command: docker build -t mlabouardy/avengers:latest .

- run:
name: Push
command: |
docker login -u$DOCKERHUB_LOGIN -p$DOCKERHUB_PASSWORD
docker tag mlabouardy/avengers:latest mlabouardy/avengers:${CIRCLE_SHA1}
docker push mlabouardy/avengers:latest
docker push mlabouardy/avengers:${CIRCLE_SHA1}

- run:
name: Deploy
command: |
zip -r deployment-${CIRCLE_SHA1}.zip .
aws s3 cp deployment-${CIRCLE_SHA1}.zip s3://avengers-docker-eb --region eu-west-3
aws elasticbeanstalk create-application-version --application-name avengers \
--version-label ${CIRCLE_SHA1} --source-bundle S3Bucket="avengers-docker-eb",S3Key="deployment-${CIRCLE_SHA1}.zip" --region eu-west-3
aws elasticbeanstalk update-environment --application-name avengers \
--environment-name staging --version-label ${CIRCLE_SHA1} --region eu-west-3

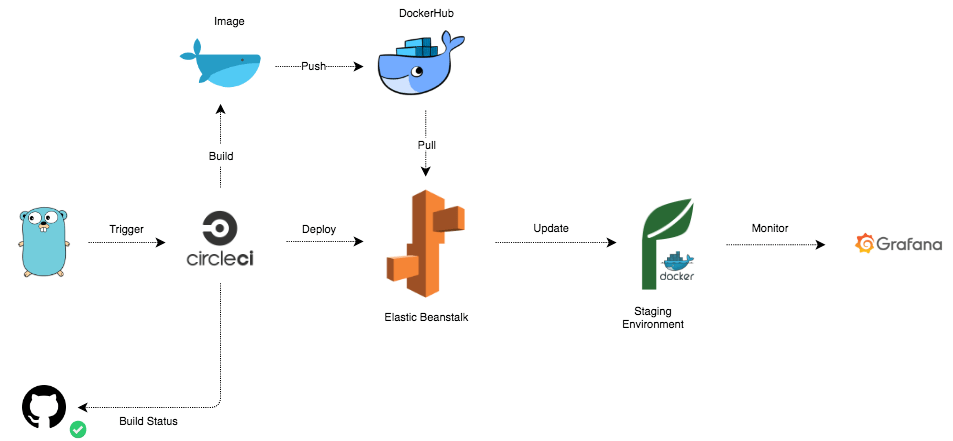
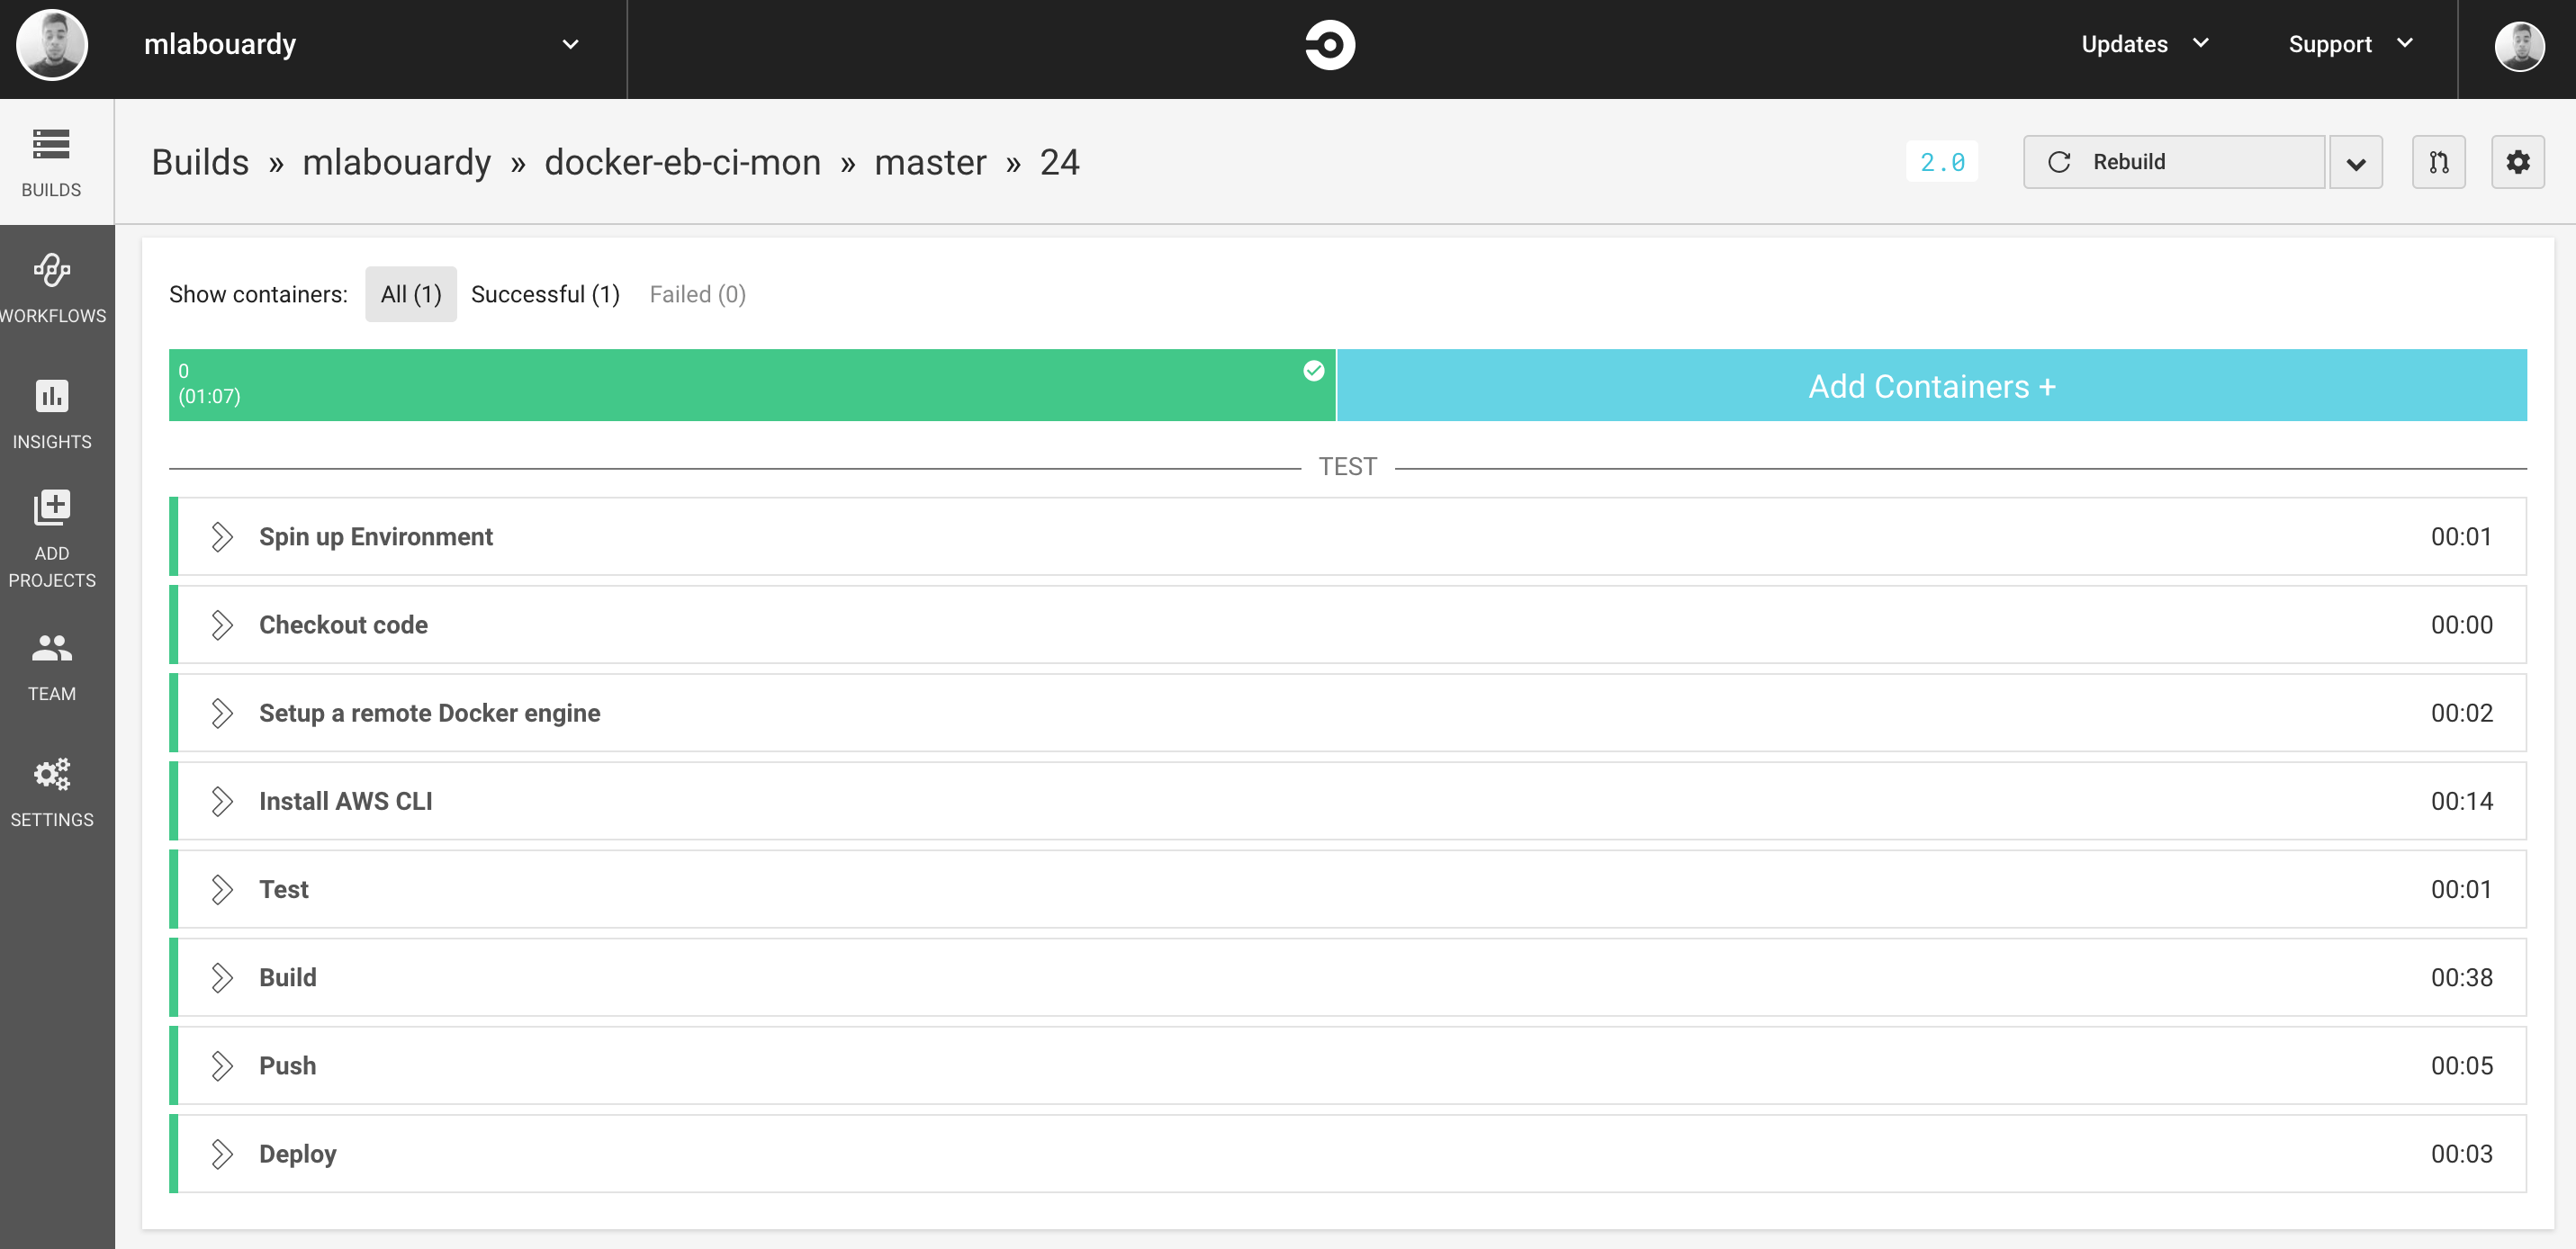
The pipeline will firstly prepare the environment, installing the AWS CLI. Then run unit tests. Next, a Docker image will be built, then pushed to DockerHub. Last step is creating a new application bundle and deploying the bundle to Elastic Beanstalk.

In order to grant Circle CI permissions to call AWS operations, we need to create a new IAM user with following IAM policy:

1
2
3
4
5
6
7
8
9
10
11
12
13
14
15
16
17
18
{
"Version": "2012-10-17",
"Statement": [
{
"Sid": "VisualEditor0",
"Effect": "Allow",
"Action": [
"elasticbeanstalk:*",
"s3:*",
"ec2:*",
"cloudformation:*",
"autoscaling:*",
"elasticloadbalancing:*"
],
"Resource": "*"
}
]
}

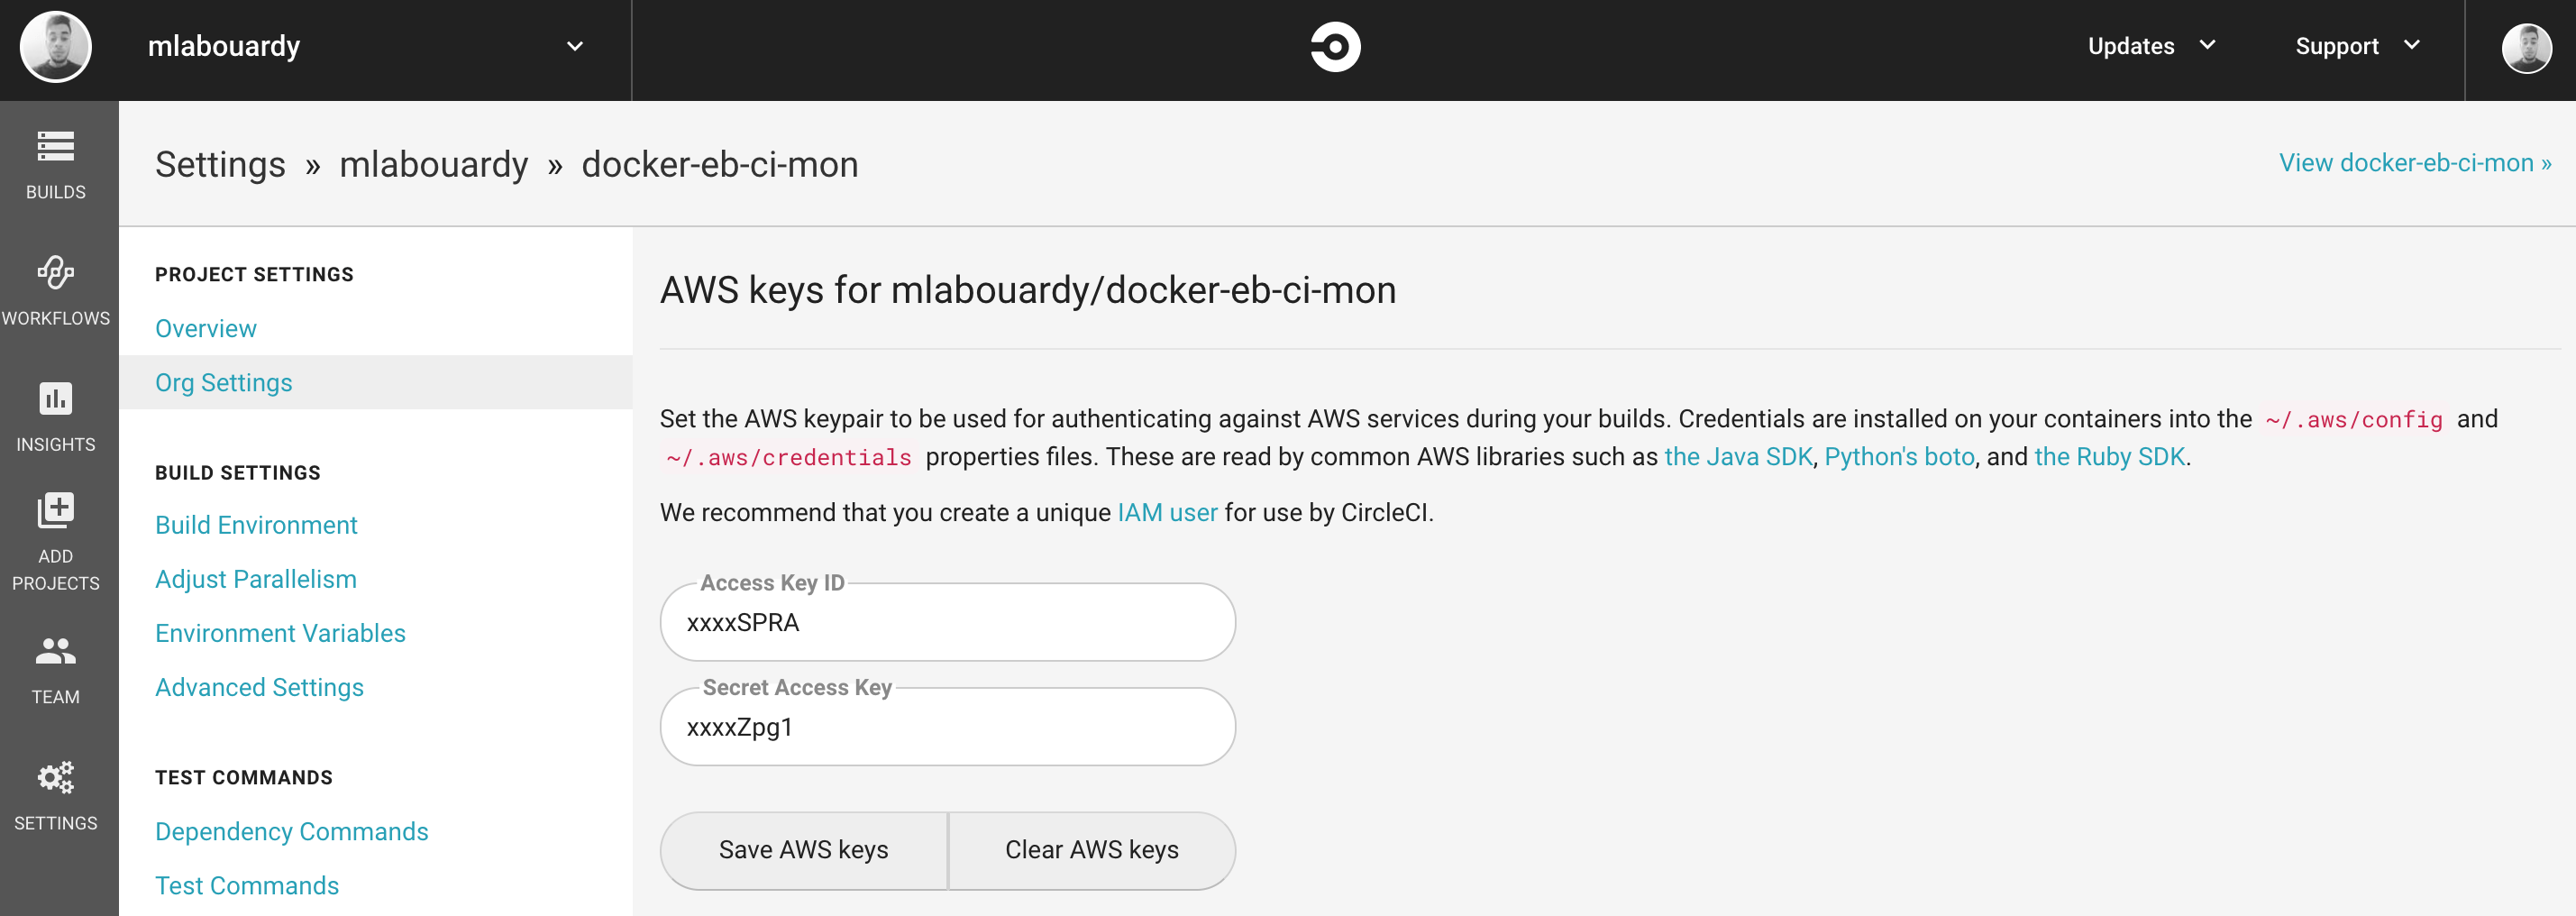
Generate AWS access & secret keys. Then, head back to Circle CI and click on the project settings and paste the credentials :


Now, everytime you push a change to your code repository, a build will be triggered:


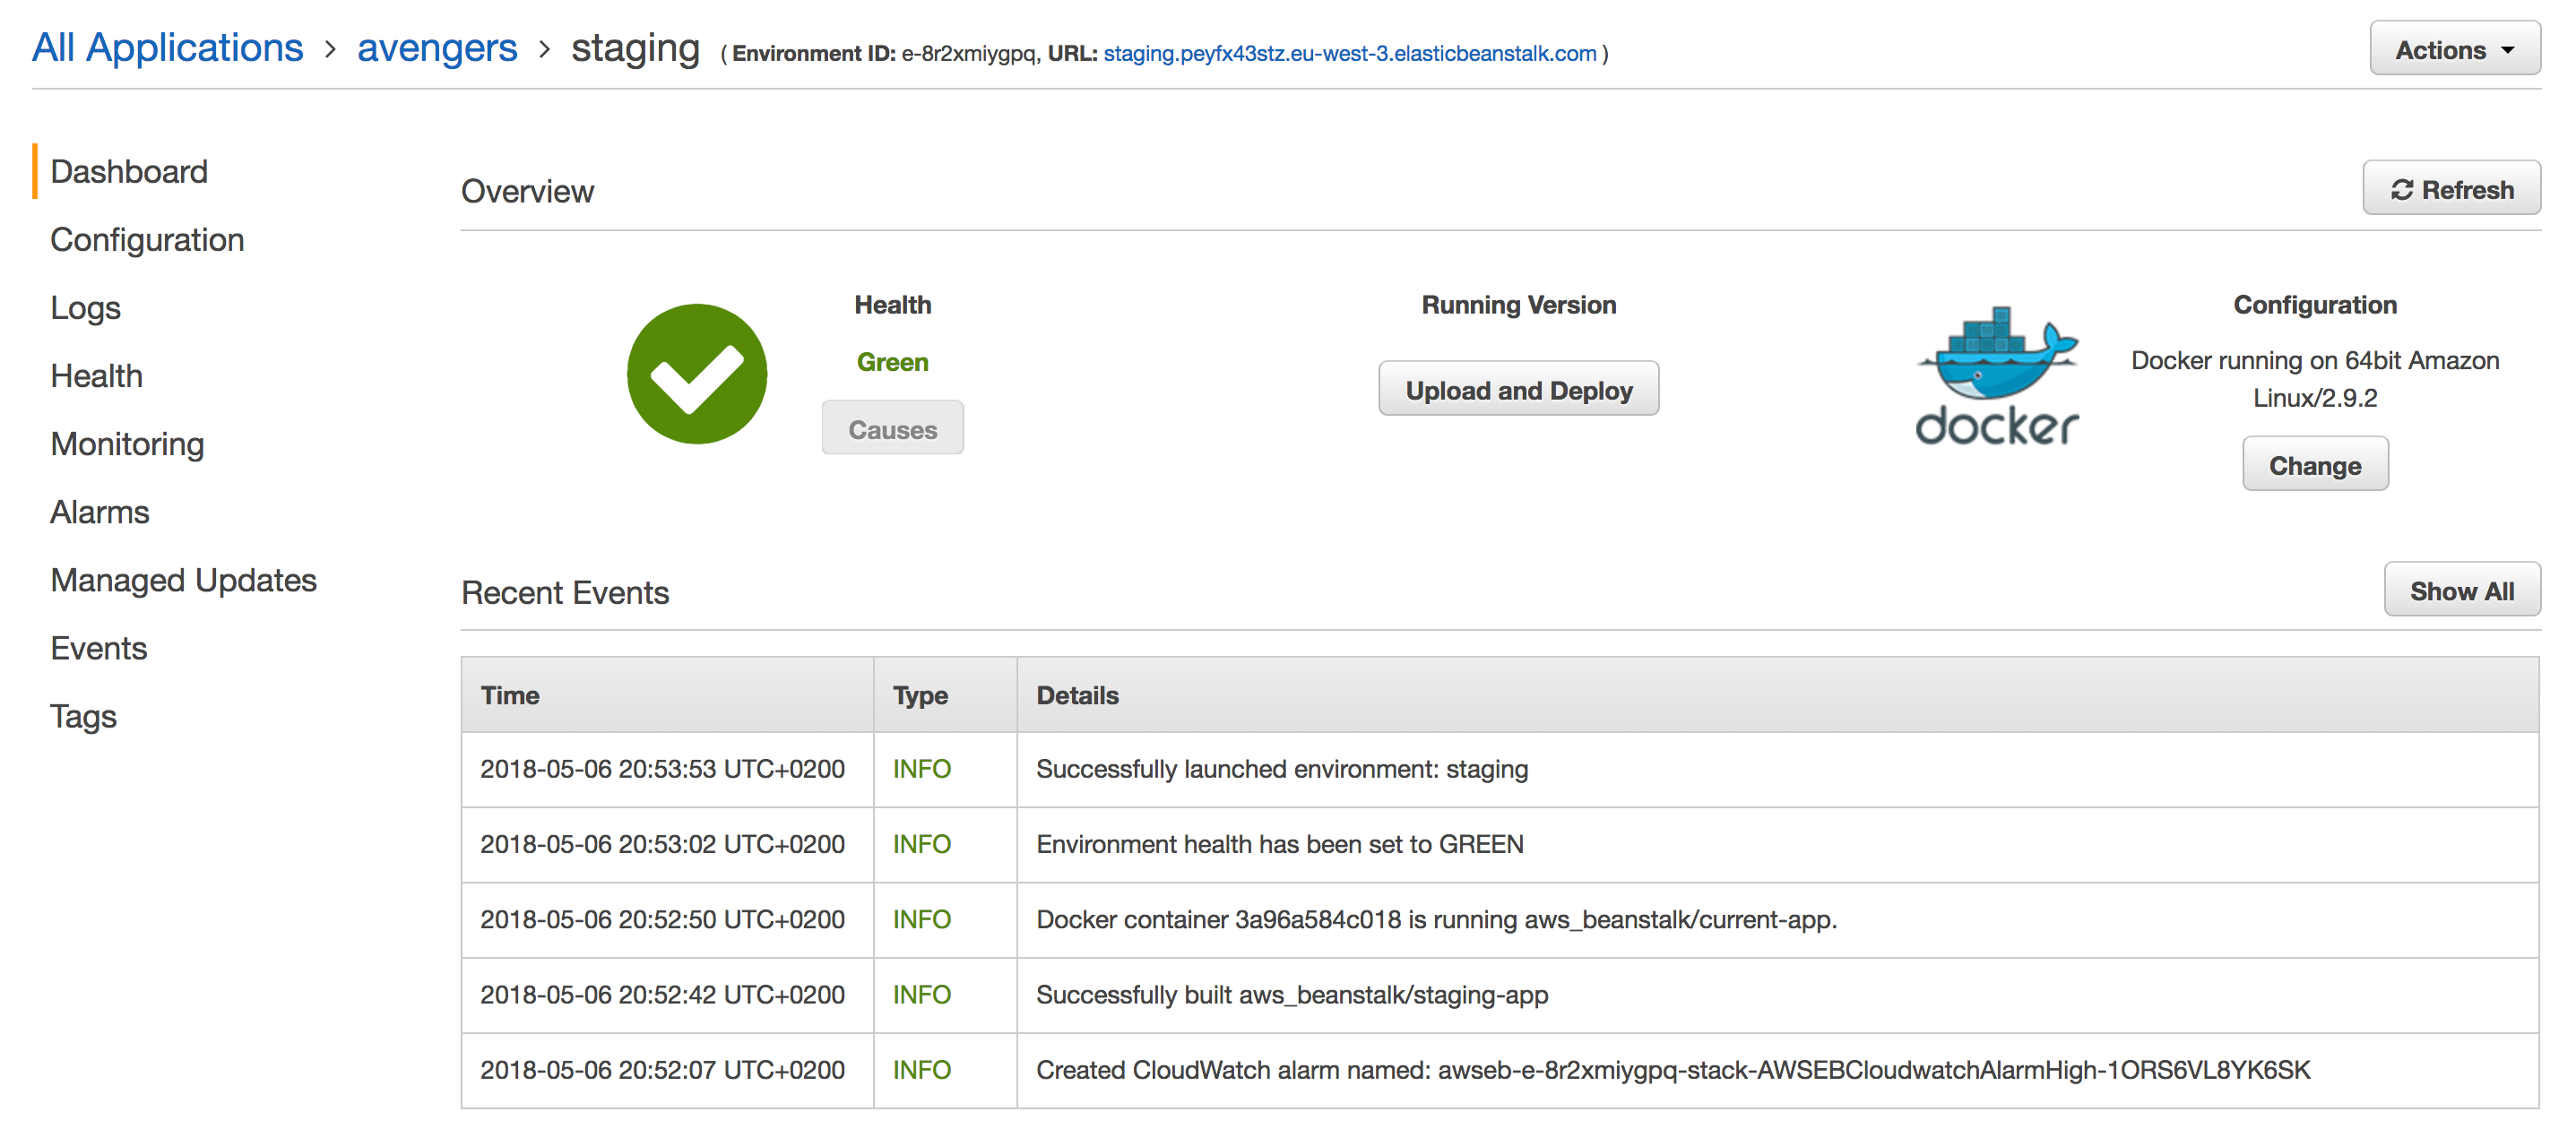
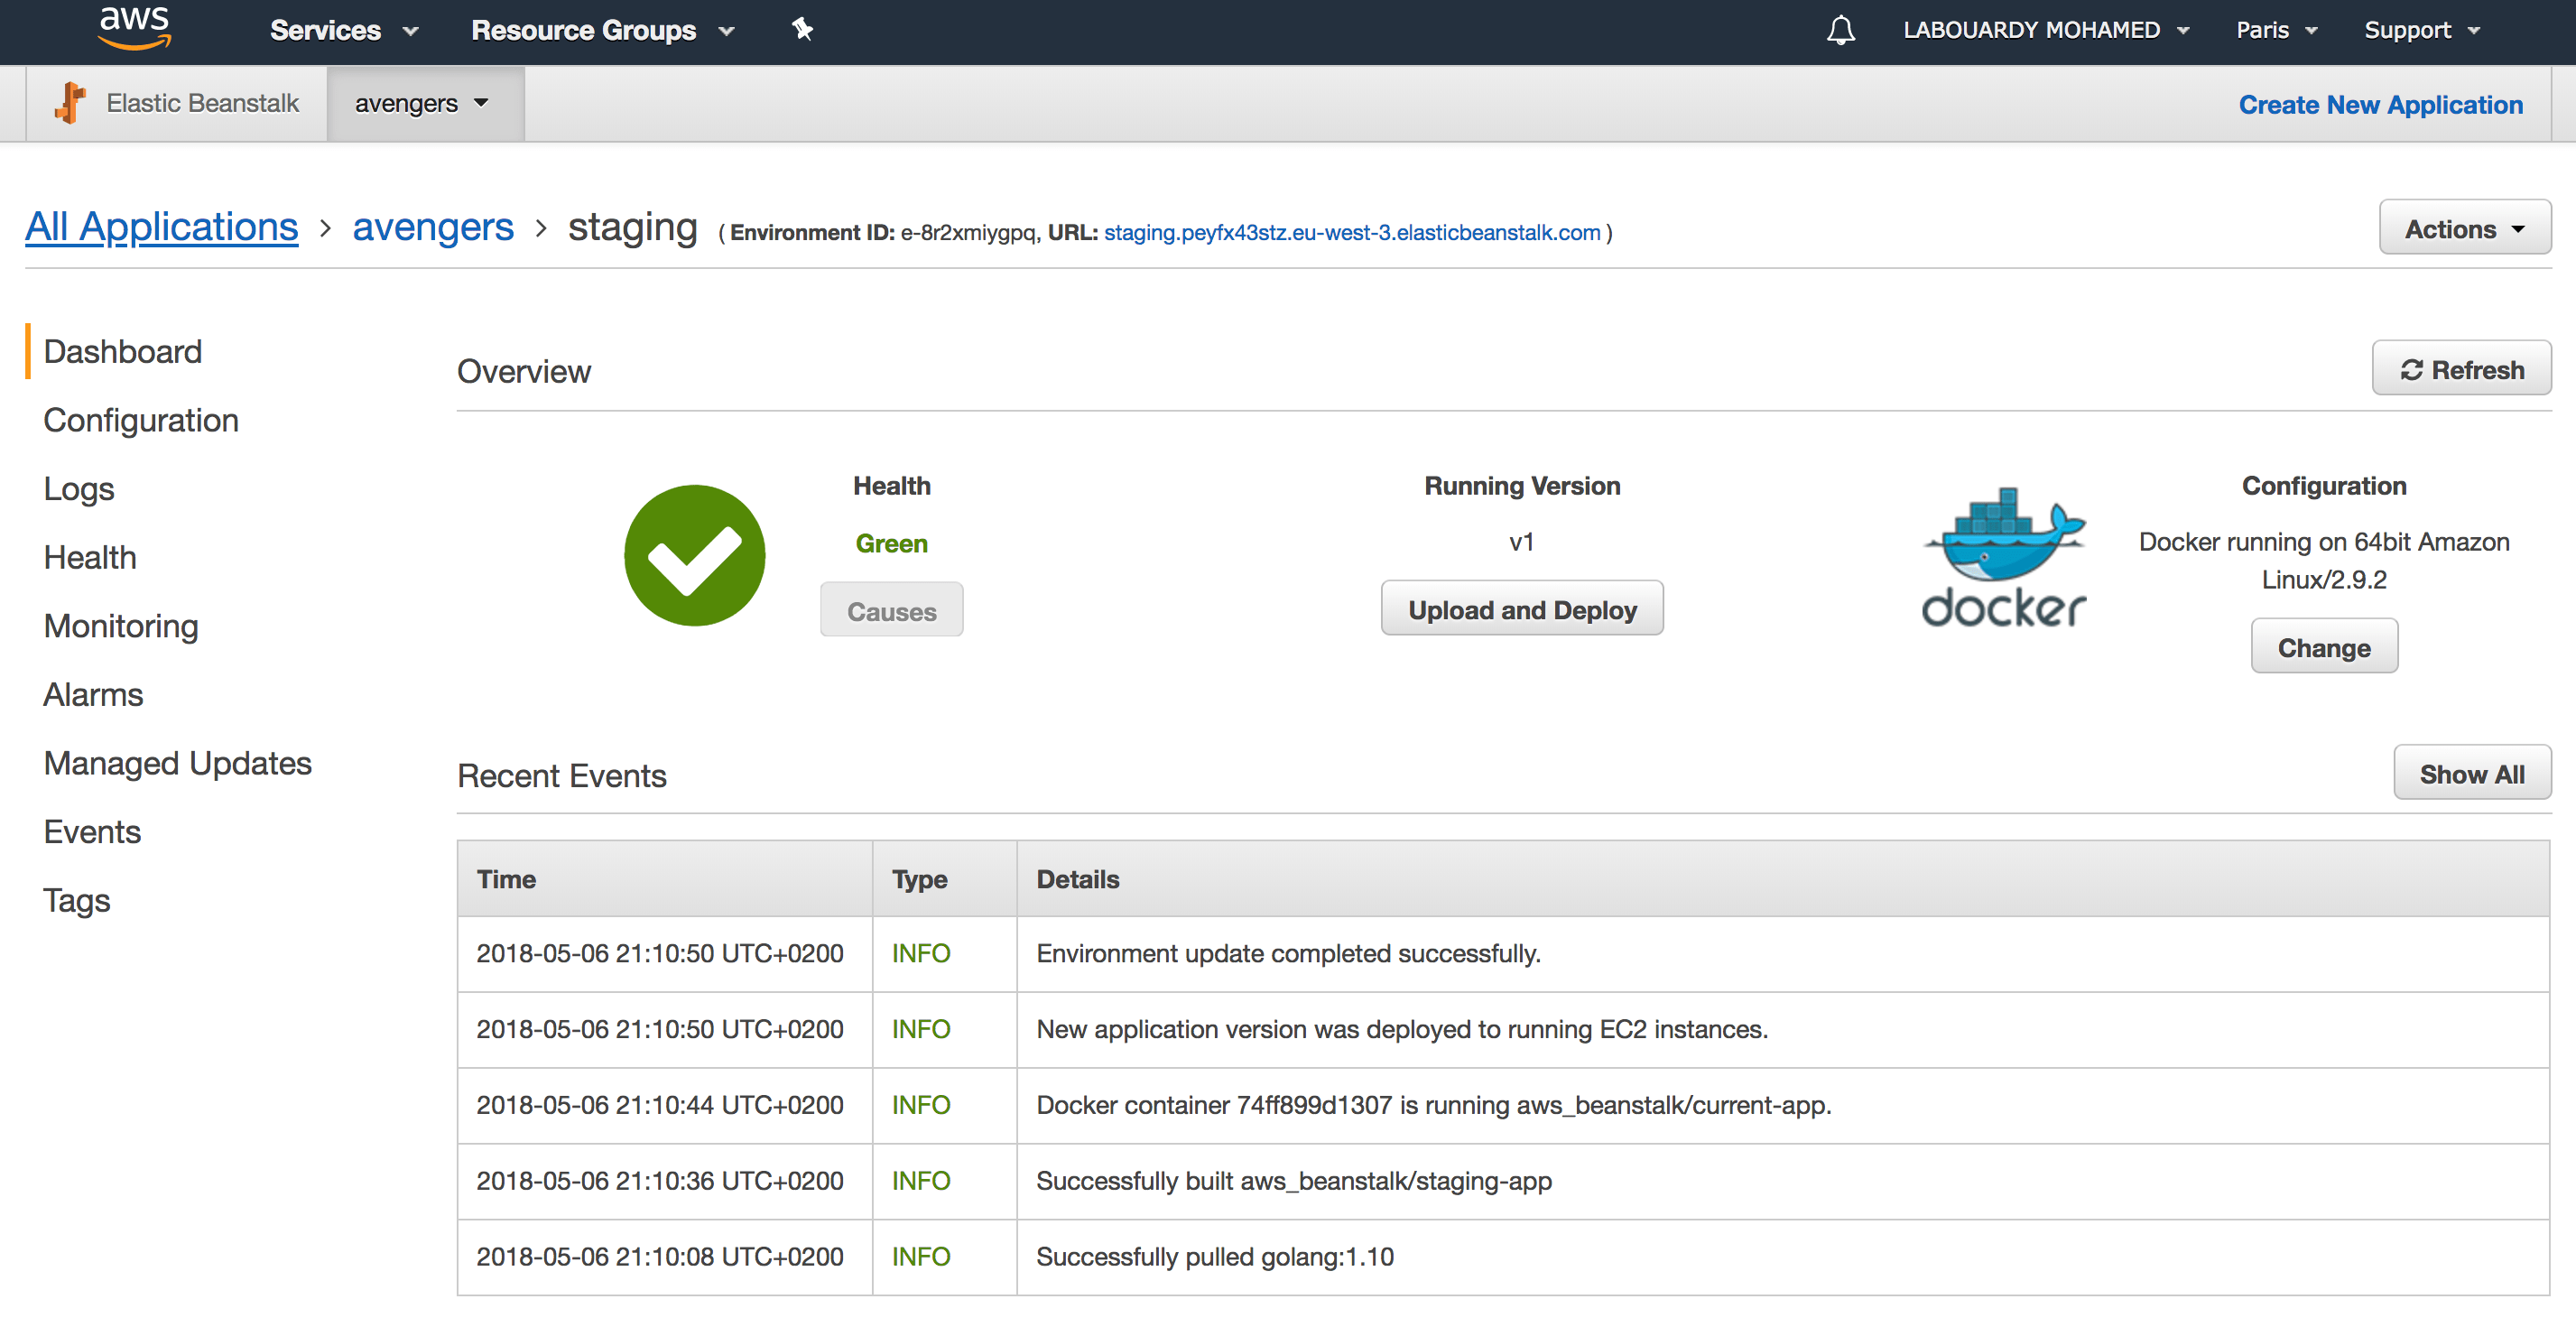
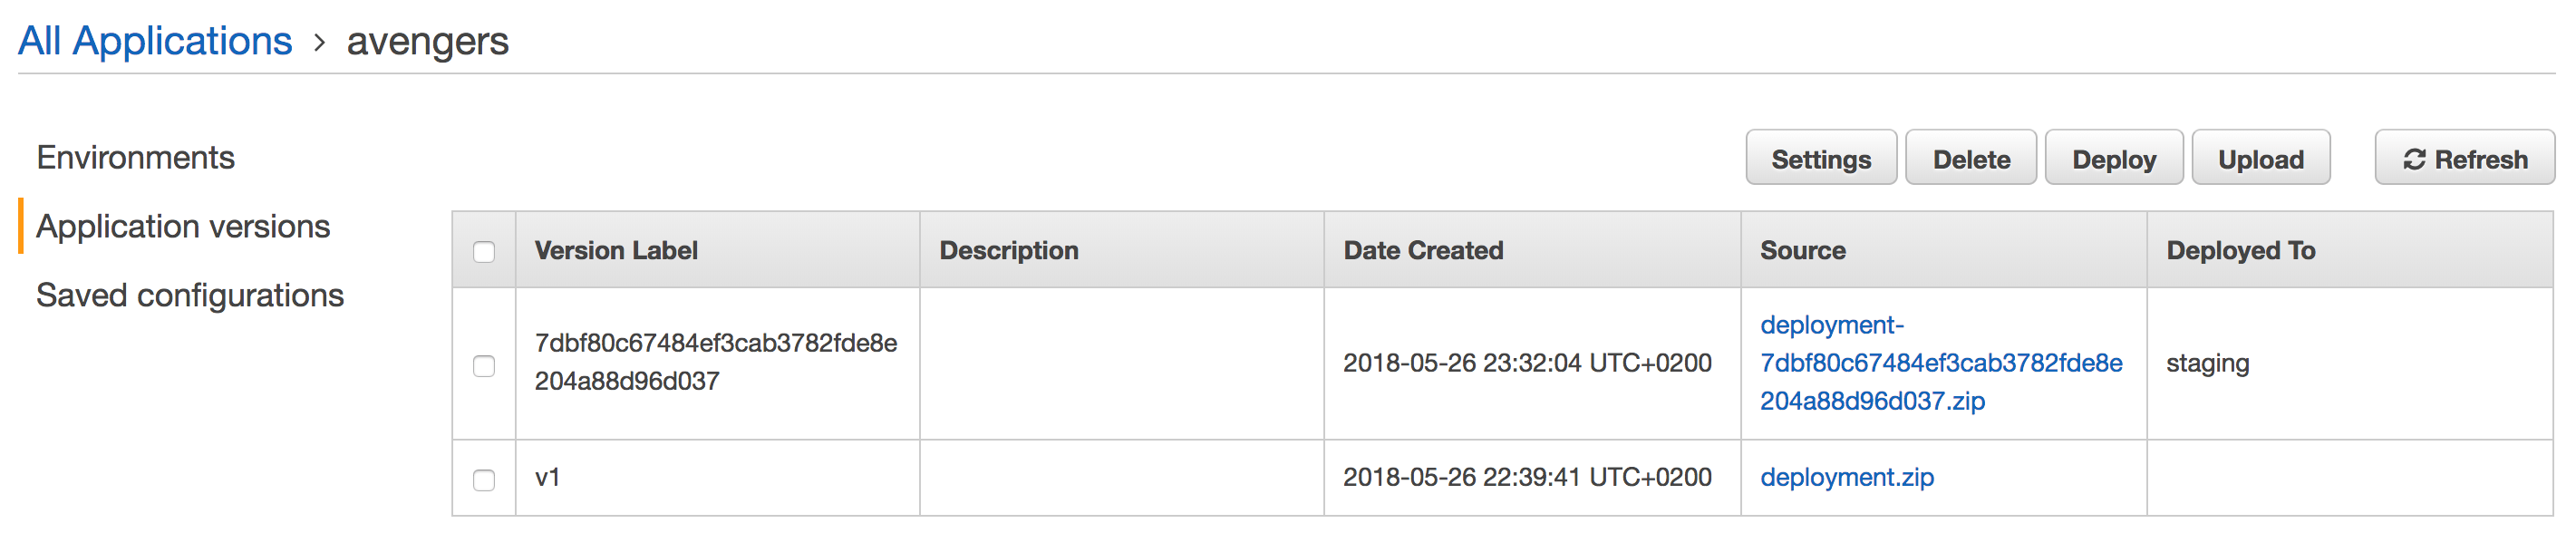
And a new version will be deployed automatically to Elastic Beanstalk:


3 – Monitoring

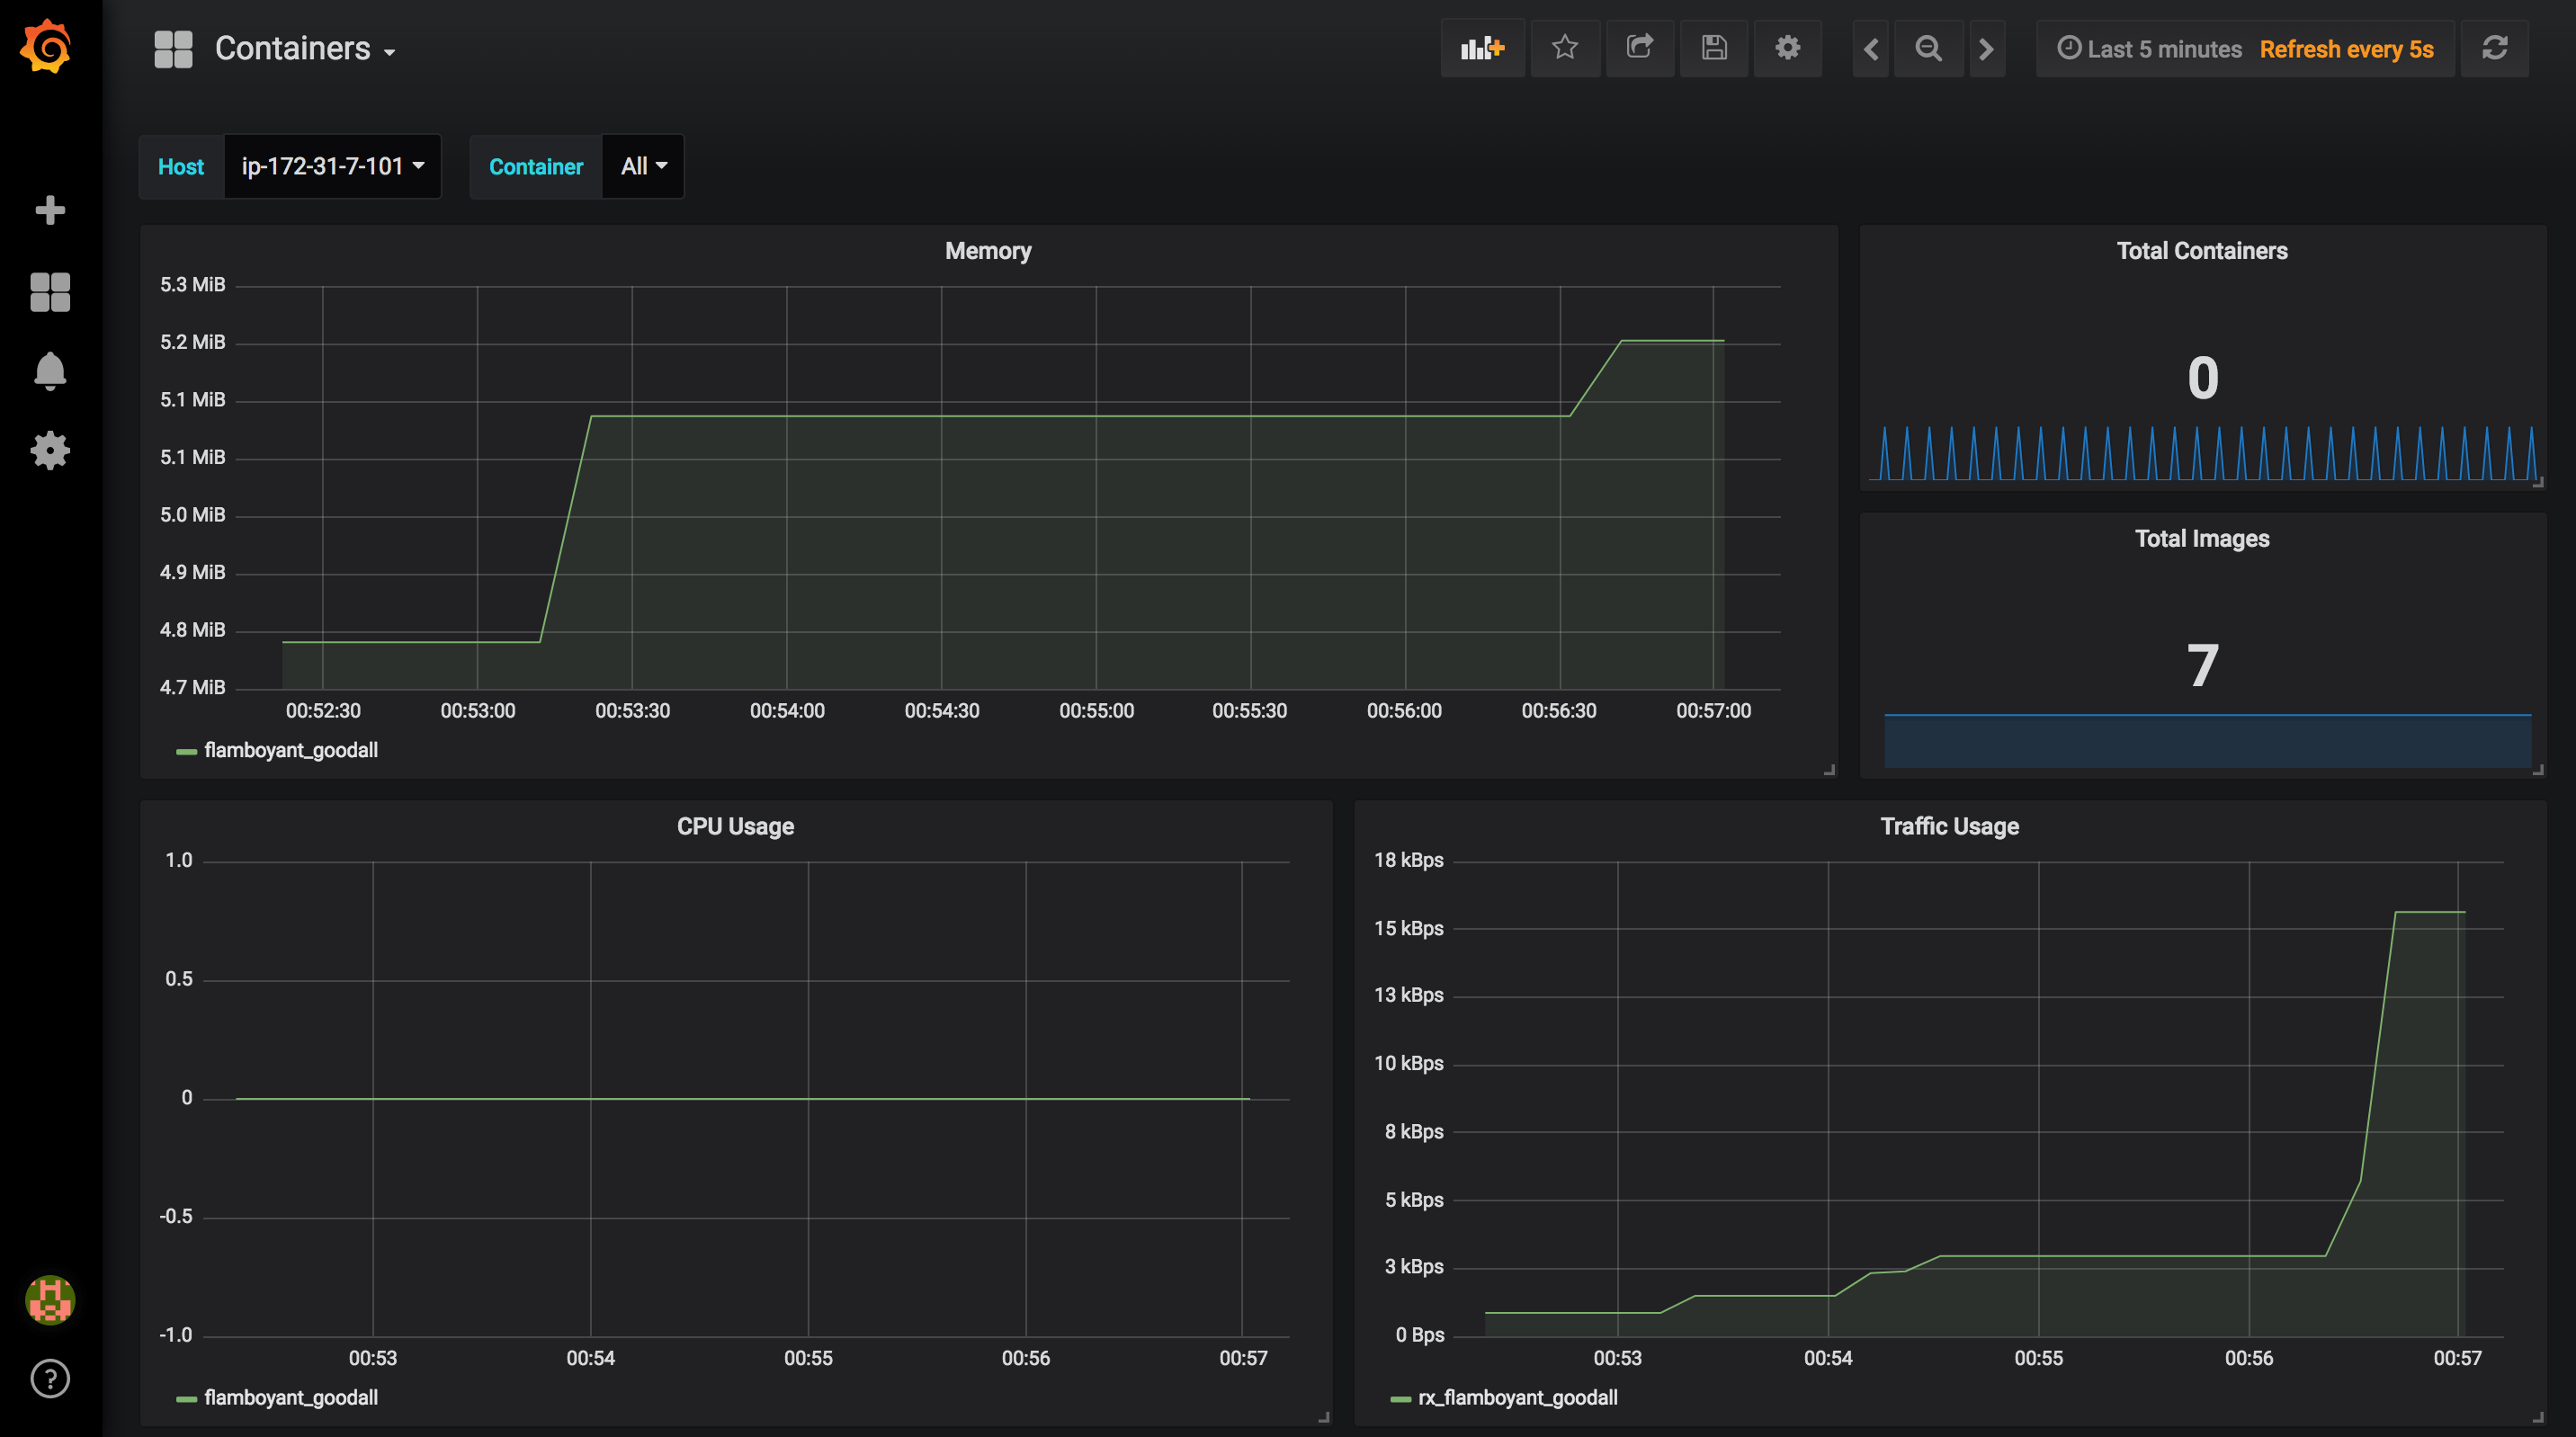
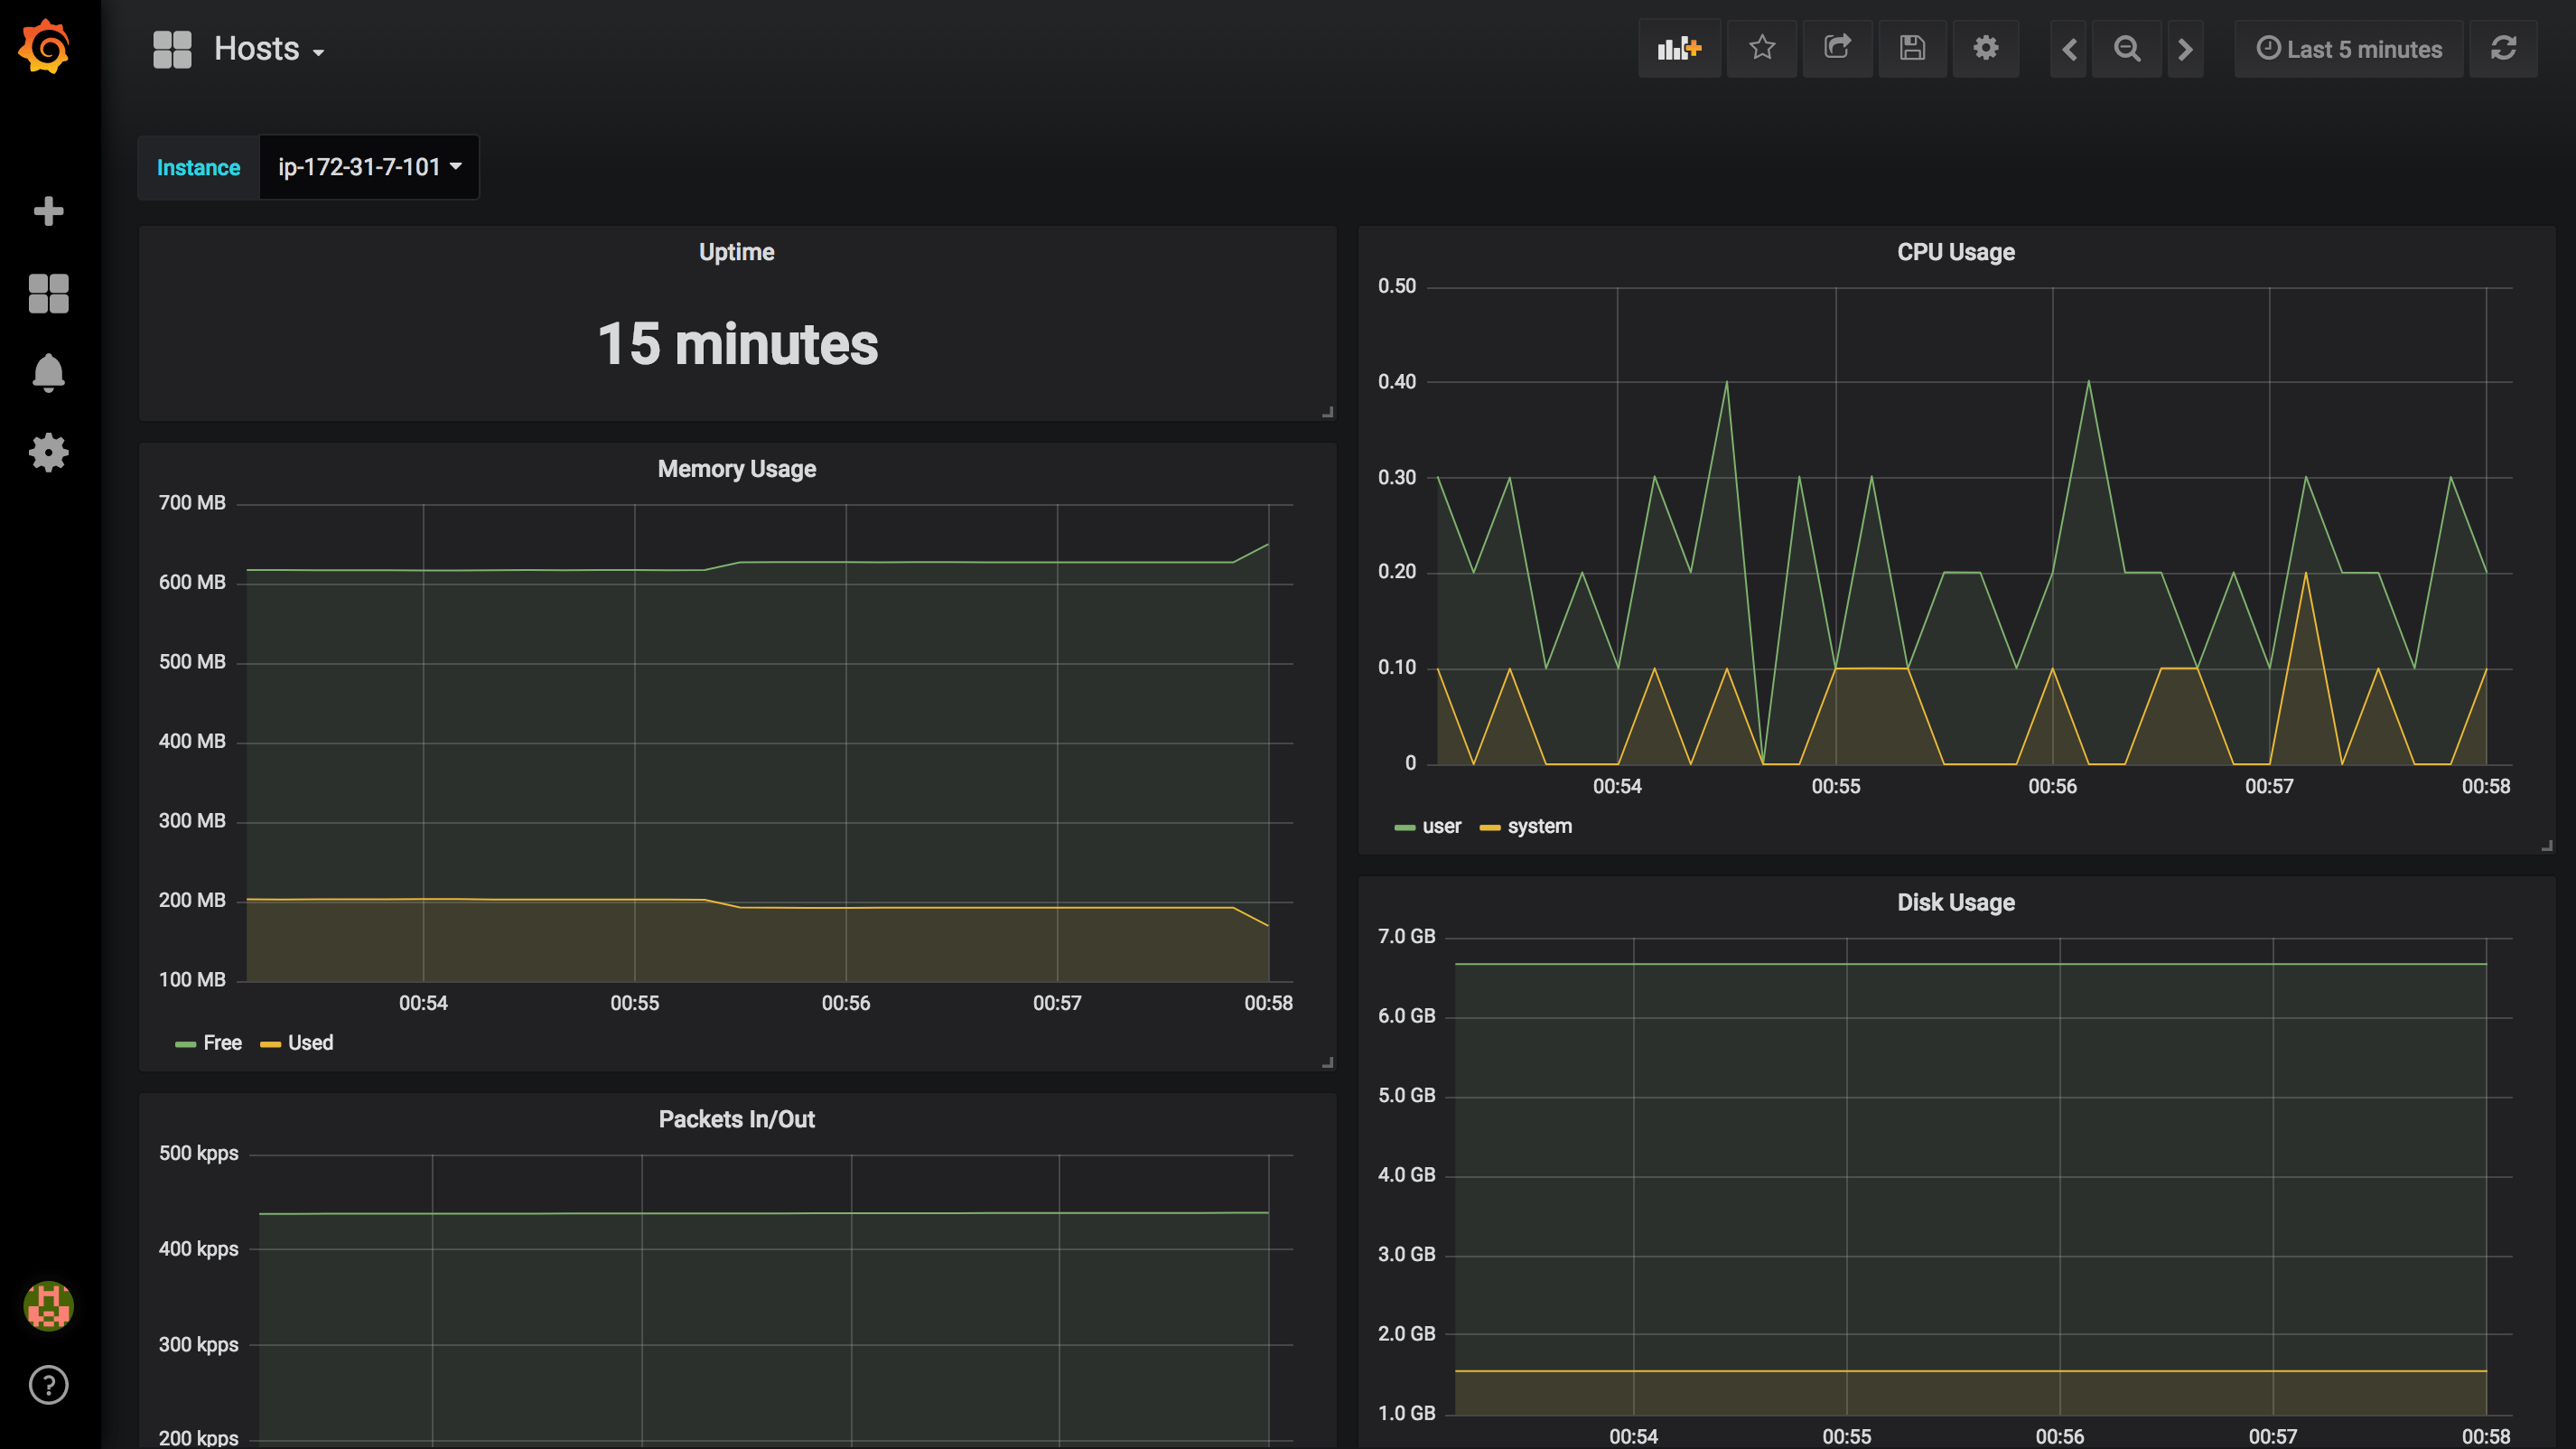
Monitoring your applications is mandatory. Unfortunately, CloudWatch doesn’t expose useful metrics like Memory usage of your applications in Elastic Beanstalk. Hence, in this part, we will solve this issue by creating our custom metrics.

I will install a data collector agent on the instance. The agent will collect metrics and push them to a time-series database.

To install the agent, we will use .ebextensions folder, on which we will create 3 configuration files:

  • 01-install-telegraf.config: install Telegraf on the instance
1
2
3
4
5
6
7
8
9
10
11
12
13
14
15
16
container_commands:
01downloadpackage:
command: "wget https://dl.influxdata.com/telegraf/releases/telegraf-1.6.0-1.x86_64.rpm -O /tmp/telegraf.rpm"
ignoreErrors: true
02installpackage:
command: "yum localinstall -y /tmp/telegraf.rpm"
ignoreErrors: true
03removepackage:
command: "rm /tmp/telegraf.rpm"
ignoreErrors: true
04enablereboot:
command: "chkconfig telegraf on"
ignoreErrors: true
05fixpermission:
command: "usermod -a -G docker telegraf"
ignoreErrors: true
  • 02-config-file.config: create a Telegraf configuration file to collect system usage & docker containers metrics.
1
2
3
4
5
6
7
8
9
10
11
12
13
14
15
16
17
18
19
20
21
22
23
24
25
26
27
28
29
30
31
32
33
34
35
36
37
38
39
40
41
42
43
44
45
46
47
48
49
50
51
52
53
54
55
files:
"/etc/telegraf/telegraf.conf":
mode: "000666"
owner: root
group: root
content: |
[global_tags]
hostname="Avengers"

# Read metrics about CPU usage
[[inputs.cpu]]
percpu = false
totalcpu = true
fieldpass = [ "usage*" ]
name_suffix = "_vm"

# Read metrics about disk usagee
[[inputs.disk]]
fielddrop = [ "inodes*" ]
mount_points=["/"]
name_suffix = "_vm"

# Read metrics about network usage
[[inputs.net]]
interfaces = [ "eth0", "eth1" ]
fielddrop = [ "icmp*", "ip*", "tcp*", "udp*" ]
name_suffix = "_vm"

# Read metrics about memory usage
[[inputs.mem]]
name_suffix = "_vm"

# Read metrics about swap memory usage
[[inputs.swap]]
name_suffix = "_vm"

# Read metrics about system load and uptime
[[inputs.system]]
name_suffix = "_vm"

# Read metrics from docker socket api
[[inputs.docker]]
endpoint = "unix:///var/run/docker.sock"
container_names = []
name_suffix = "_docker"

[[outputs.influxdb]]
database = "instances"
urls = ["http://172.31.38.51:8086"]
namepass = ["*_vm"]

[[outputs.influxdb]]
database = "containers"
urls = ["http://172.31.38.51:8086"]
namepass = ["*_docker"]
  • 03-start-telegraf.config: start Telegraf agent.
1
2
3
4
container_commands:
01starttelegraf:
command: "service telegraf start"
ignoreErrors: true

Once the application version is deployed to Elastic Beanstalk, metrics will be pushed to your timeseries database. In this example, I used InfluxDB as data storage and I created some dynamic Dashboards in Grafana to visualize metrics in real-time:

Containers:


Hosts:


Note: for in-depth explaination on how to configure Telegraf, InfluxDB & Grafana read my previous article.

Full code can be found on my GitHub. Make sure to drop your comments, feedback, or suggestions below — or connect with me directly on Twitter @mlabouardy

Comments

Your browser is out-of-date!

Update your browser to view this website correctly. Update my browser now

×