

Are you tired of maintaining your CMS (WordPress, Drupal, etc) ? Paying expensive hosting fees? Fixing security issues everyday ?

I discovered not long ago a new blogging framework called Hexo which let you publish Markdown documents in the form of blog post. So as always I got my hands dirty and wrote this post to show you how to build a production-ready blog with Hexo and use the AWS S3 to make your blog Serverless and pay only per usage. Along the way, I will show you how to automate the deployment of new posts by setting up a CI/CD pipeline
To get started, Hexo requires Node.JS & Git to be installed. Once all requirements are installed, issue the following command to install Hexo CLI:
1 | npm install -g hexo-cli |
Next, create a new empty project:
1 | hexo init slowcoder.com |
Modify blog global settings in _config.yml file:
1 | # Site |
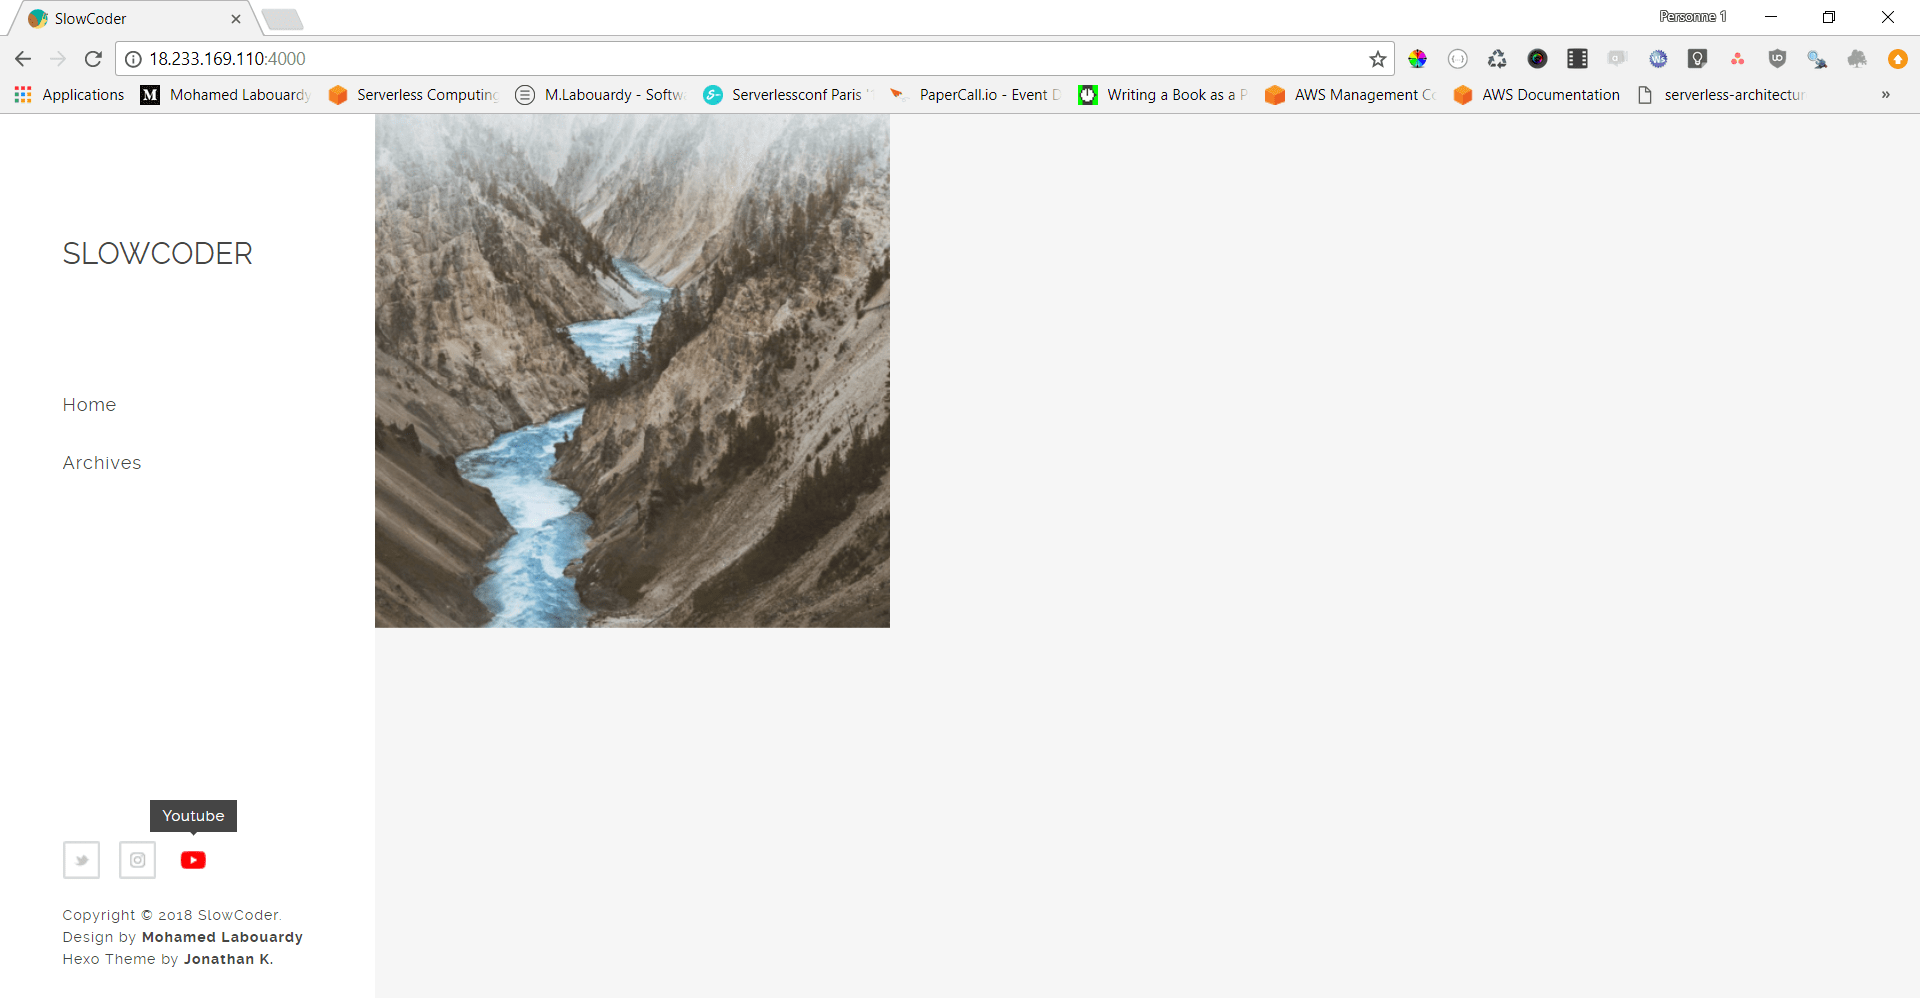
Start a local server with “hexo server“. By default, this is at http://localhost:4000. You’ll see Hexo’s pre-defined “Hello World” test post:

If you want to change the default theme, you just need to go here and find a new one you prefer.
I opt for Magnetic Theme as it includes many features:
- Disqus and Facebook comments
- Google Analytics
- Cover image for posts and pages
- Tags Support
- Responsive Images
- Image Gallery
- Social Accounts configuration
- Pagination
Clone the theme GitHub repository as below:
1 | git clone https://github.com/klugjo/hexo-theme-magnetic themes/magnetic |
Then update your blog’s main _config.yml to set the theme to magnetic. Once done, restart the server:
Now you are almost done with your blog setup. It is time to write your first article. To generate a new article file, use the following command:
1 | hexo new POST_TITLE |

Now, sign in to AWS Management Console, navigate to S3 Dashboard and create an S3 Bucket or use the AWS CLI to create a new one:
1 | aws s3 mb s3://slowcoder.com |
Add the following policy to the S3 bucket to make all objects public by default:
1 | { |
Next, enable static website hosting on the S3 bucket:
1 | aws s3 website s3://slowcoder.com --index-document index.html |
In order to automate the process of deployment of the blog to S3 each time a new article is been published. We will setup a CI/CD pipeline using CircleCI.
Sign in to CircleCI using your GitHub account, then add the circle.yml file to your project:
1 | version: 2 |
Note: Make sure to set the AWS Access Key ID and Secret Access Key in your Project’s Settings page on CircleCI (s3:PutObject permission).
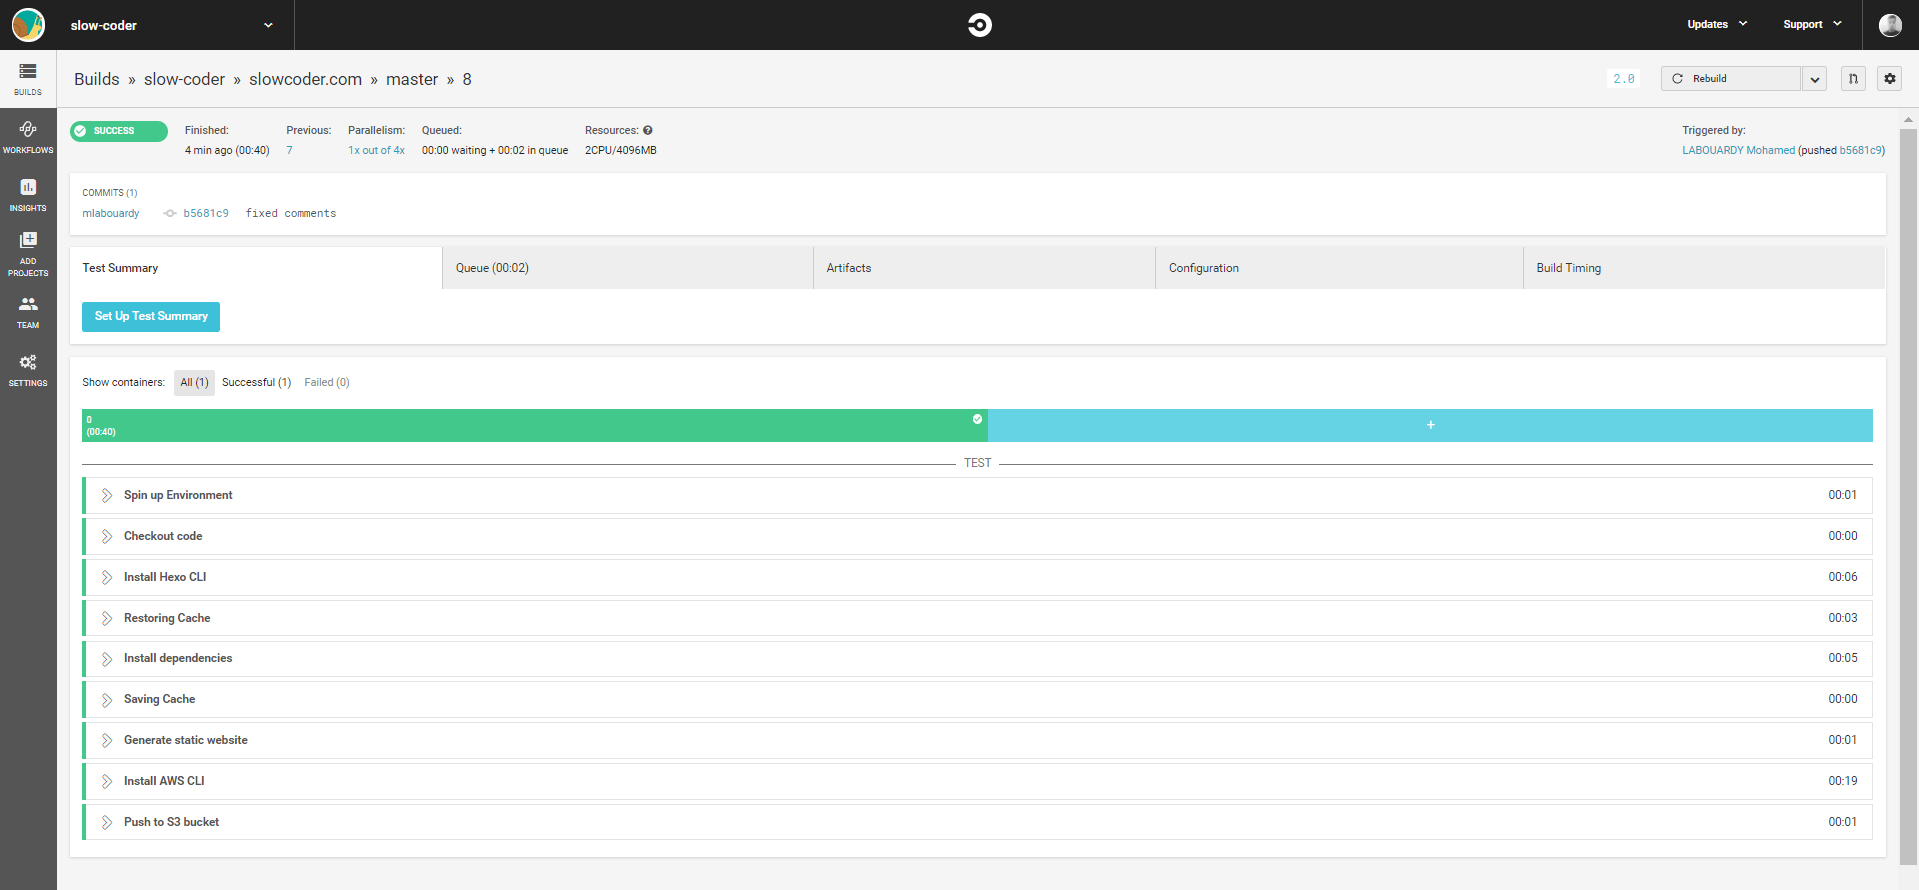
Now every time you push changes to your GitHub repo, CircleCI will automatically deploy the changes to S3. Here’s a passing build:
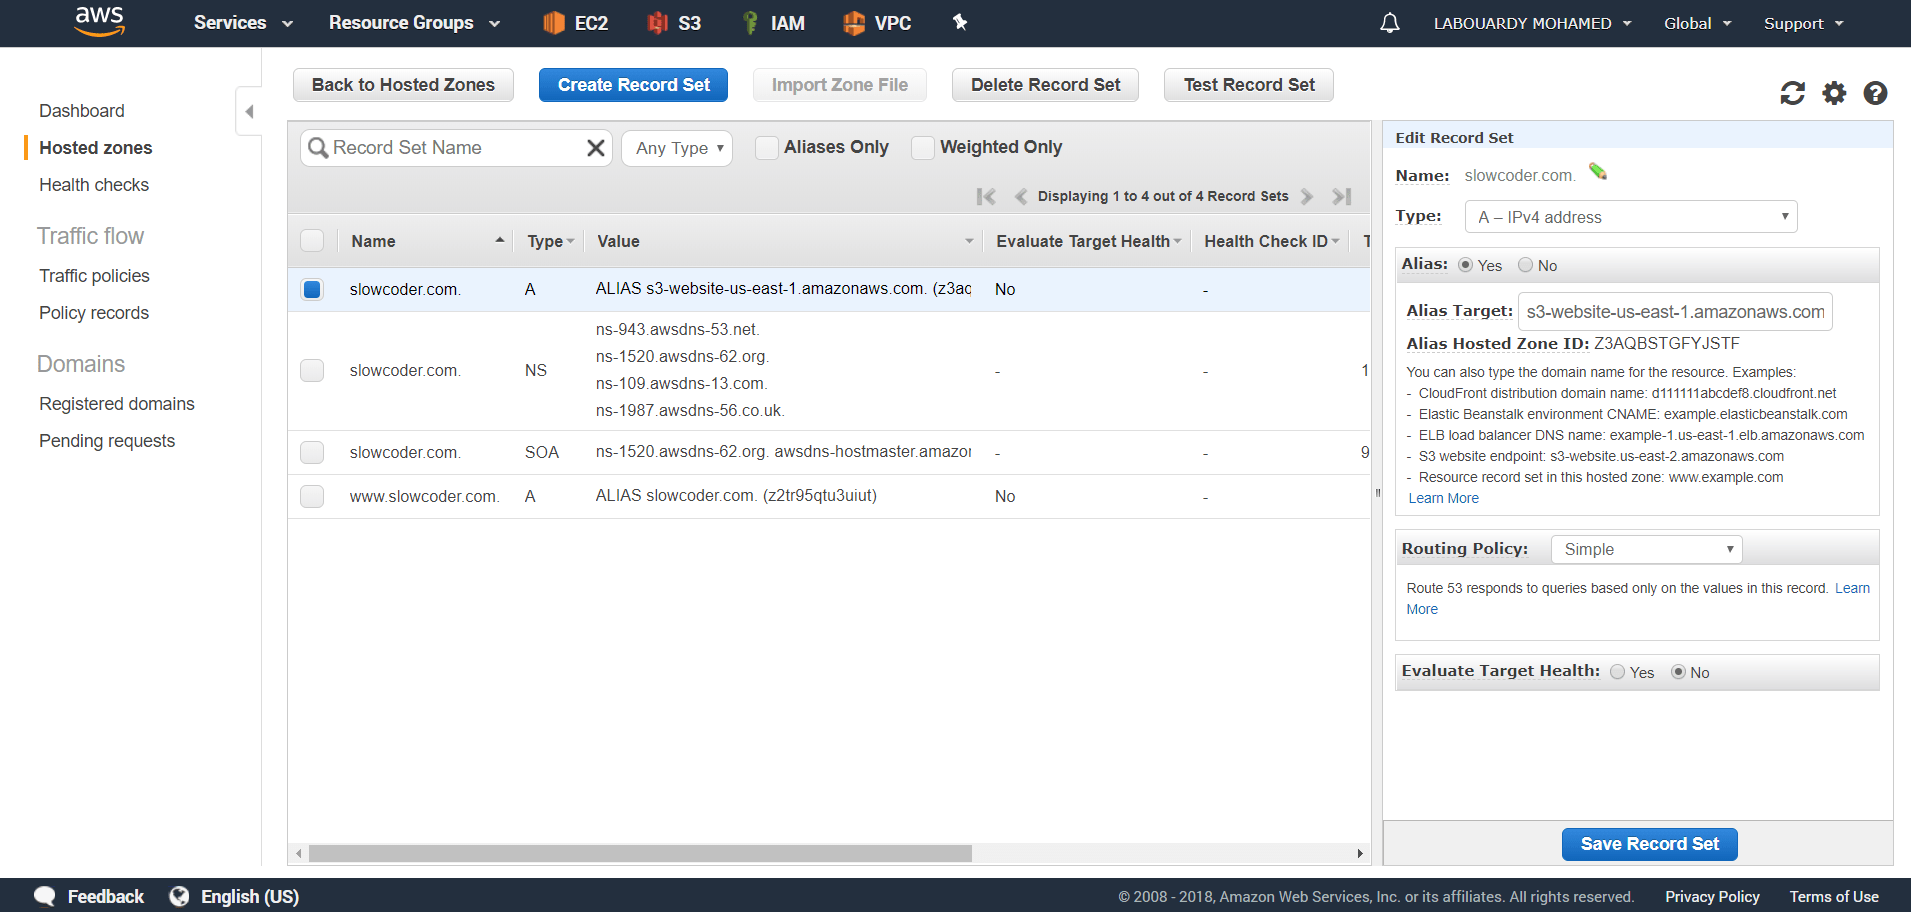
Finally, to make our blog user-friendly, we will setup a custom domain name in Route53 as below:
Note: You can go further and setup a CloudFront Distribution in front of the S3 bucket to optimize delivery of blog assets.
You can test your brand new blog now by typing the following adress: http://slowcoder.com :

Drop your comments, feedback, or suggestions below — or connect with me directly on Twitter @mlabouardy.